
Raspberry Pi as USB/Bluetooth MIDI host (detailed instructions)

Here are some instructions for setting up a Raspberry Pi 3B or a Raspberry Pi 4B as a MIDI host for USB or Bluetooth musical equipment. The purpose is to build an as-simple-as-possible device with no user interface that can be switched on and off by simply connecting/disconnecting to/from a power source.
For easy instructions with a pre-made image, use this page.
WHAT WE NEED
- a Raspberry Pi 3B or a Raspberry Pi 4B (the complete instructions are specific for 3B and 3B+ models, both equipped with WiFi and Bluetooth, but other models should work as well with minor tweaks)
- a microSD card (4GB is enough. More is ok, but useless in this case)
- a micro USB power charger, sending at least 2A (most modern smartphone power chargers suffice)
- a ssh capable computer for logging into the Raspberry (once the setup is finished, this is no longer needed)
- a USB/MIDI music device for testing
- optional a MIDI-Bluetooth device for testing Bluetooth connectivity
- optional an OLED display like this for MIDI connectivity status
The steps are as follows:
- Prepare the microSD card
- Install required packages
- Add read-only mode
- Configure boot and udev scripts
- Configure Bluetooth optional
- Configure the LCD display optional
PREPARING THE MICROSD CARD
Download RASPBIAN STRETCH LITE
Download and install Etcher
Use Etcher to flash the image to the microSD card
Configure WiFi for ssh access (complete guide here):
- Create a file named
wpa_supplicant.confunder microSDbootfolder and copy/paste the following content (replace with your access point data):
country=US
ctrl_interface=DIR=/var/run/wpa_supplicant GROUP=netdev
update_config=1

network={
    ssid="YOUR_NETWORK_NAME"
    scan_ssid=1
    psk="YOUR_PASSWORD"
    key_mgmt=WPA-PSK
}- Create an empty file named
ssh(no extension) under SDbootfolder
Unmount the microSD and plug it on the Raspberry
POST-INSTALL PACKAGES
Boot the Raspberry Pi
Find its IP address, with a tool like Nmap
nmap --open -p 22 192.168.1.*(replace 192.168.1.* with your access point subnet)
ssh into it, with username pi and password raspberry (for operating systems lacking an SSH client, https://putty.org/ is a free good option).
Issue the following commands:
sudo apt-get update
sudo apt-get upgrade
sudo apt-get install ruby git
CONFIGURING AUTOMATIC MIDI CONNECTION
Issue the command sudo nano /usr/local/bin/connectall.rb and copy the following content (all credits for this goes to the author of the script) (to save and exit from nano editor, issue ctrl + O followed by ctrl + X )
#!/usr/bin/ruby

# unconnect everything
system "aconnect -x"

t = `aconnect -i -l`
ports = []
names = []
t.lines.each do |l|
  /client (\d*)\: '(.*)'/=~l
  port = $1
  name = $2
  # we skip empty lines and the "Through" port
  unless $1.nil? || $1 == '0' || /Through/=~l
    ports << port
    names << name
  end
end

ports.each do |p1|
  ports.each do |p2|
    unless p1 == p2 # probably not a good idea to connect a port to itself
      system  "aconnect #{p1}:0 #{p2}:0"
    end
  end
end
Issue the command
sudo chmod +x /usr/local/bin/connectall.rbYou can test the auto-connection with command
connectall.rband checking results with
aconnect -lConfigure automatic MIDI connection/disconnection on USB device connect/disconnect:
sudo nano /etc/udev/rules.d/33-midiusb.rulesCopy the following content and save the file
ACTION=="add|remove", SUBSYSTEM=="usb", DRIVER=="usb", RUN+="/usr/local/bin/connectall.rb" Issue the following commands:
sudo udevadm control --reload
sudo service udev restart
Configure MIDI connection at system boot:
sudo nano /lib/systemd/system/midi.serviceCopy the following content and save the file
[Unit]
Description=Initial USB MIDI connect

[Service]
ExecStart=/usr/local/bin/connectall.rb

[Install]
WantedBy=multi-user.target
Issue the following commands:
sudo systemctl daemon-reload
sudo systemctl enable midi.service
sudo systemctl start midi.service
To test automatic connection, you can use the command aconnect -l
ENABLING READ-ONLY MODE
Once the setup is finished, it's advisable to make the raspberry read-only to avoid the possibility of microSD data corruption when powering off by unplugging it directly from the power source.
git clone https://gitlab.com/larsfp/rpi-readonly
cd rpi-readonly
sudo ./setup.sh
Once your setup is tested (try plugging and unplugging various MIDI devices, and test connection with the command aconnect -l), you can turn on readonly mode with the command ro. Now you can safely power off the unit by unplugging it from the power source.
In order to modify files, you can turn readonly mode off with the command rw. Just remember to put it back to ro before logging out.
MIDI BLUETOOTH SETUP
Optional
Bluetooth setup involves recompiling the standard GNU/Linux bluetooth stack bluez to enable optional support for the alsa audio toolset. Remember to switch to rw mode before performing the following operations, and to switch back to ro when finished.
git clone https://github.com/oxesoft/bluez
sudo apt-get install -y autotools-dev libtool autoconf
sudo apt-get install -y libasound2-dev
sudo apt-get install -y libusb-dev libdbus-1-dev libglib2.0-dev libudev-dev libical-dev libreadline-dev
cd bluez
./bootstrap
./configure --enable-midi --prefix=/usr --mandir=/usr/share/man --sysconfdir=/etc --localstatedir=/var
make
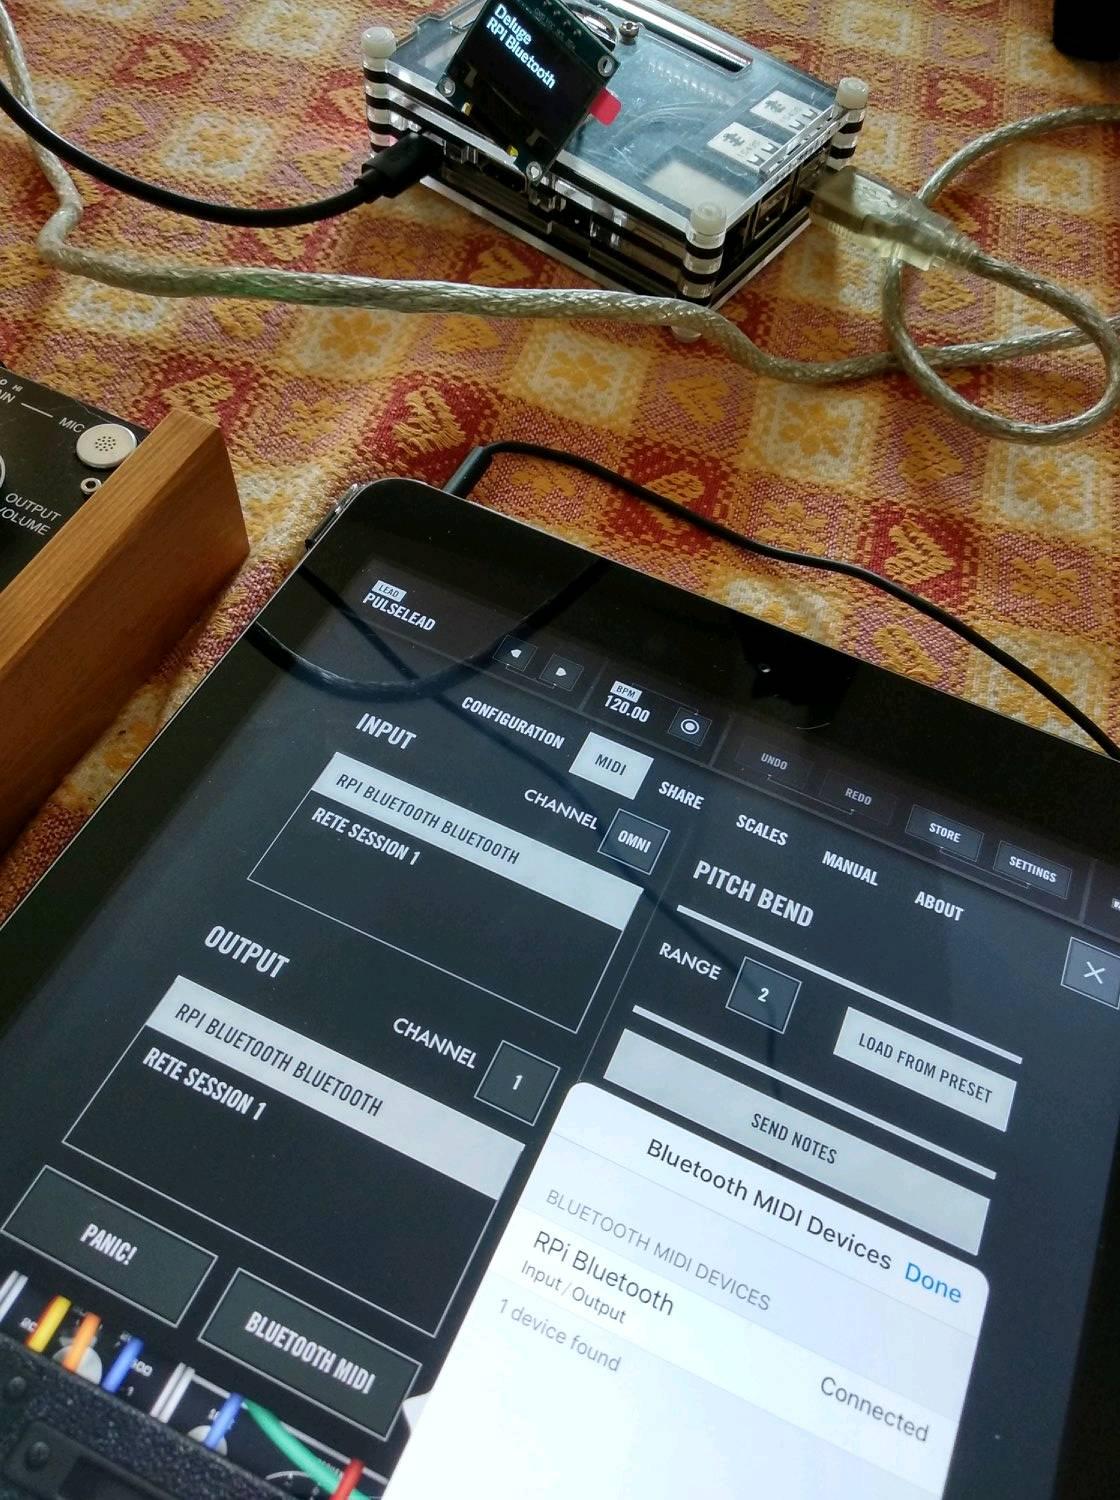
sudo make installYou should now be able to test Bluetooth MIDI with sudo btmidi-server -v -n "RPi Bluetooth" (change RPi Bluetooth to anything you like) and by discovering Bluetooth MIDI devices with an app that supports that.
Create file sudo nano /etc/udev/rules.d/44-bt.rules with the following content:
ACTION=="add|remove", SUBSYSTEM=="bluetooth", RUN+="/usr/local/bin/connectall.rb"
Reload udev configuration and daemon with the following commands:
sudo udevadm control --reload
sudo service udev restart
Create a startup file for starting btmidi-server as daemon: sudo nano /lib/systemd/system/btmidi.service
[Unit]
Description=MIDI Bluetooth connect
After=bluetooth.target sound.target multi-user.target
Requires=bluetooth.target sound.target

[Service]
Type=simple
User=root
Group=root
WorkingDirectory=/home/pi
StandardOutput=syslog
StandardError=syslog
SyslogIdentifier=btmidi
Restart=always
ExecStart=/usr/bin/btmidi-server -n "RP4-Bluetooth"

[Install]
WantedBy=multi-user.target
Enable the service:
sudo systemctl daemon-reload
sudo systemctl enable btmidi.service
sudo systemctl start btmidi.service
Revert to readonly mode with command ro, and reboot (sudo reboot) to test that everything is working.
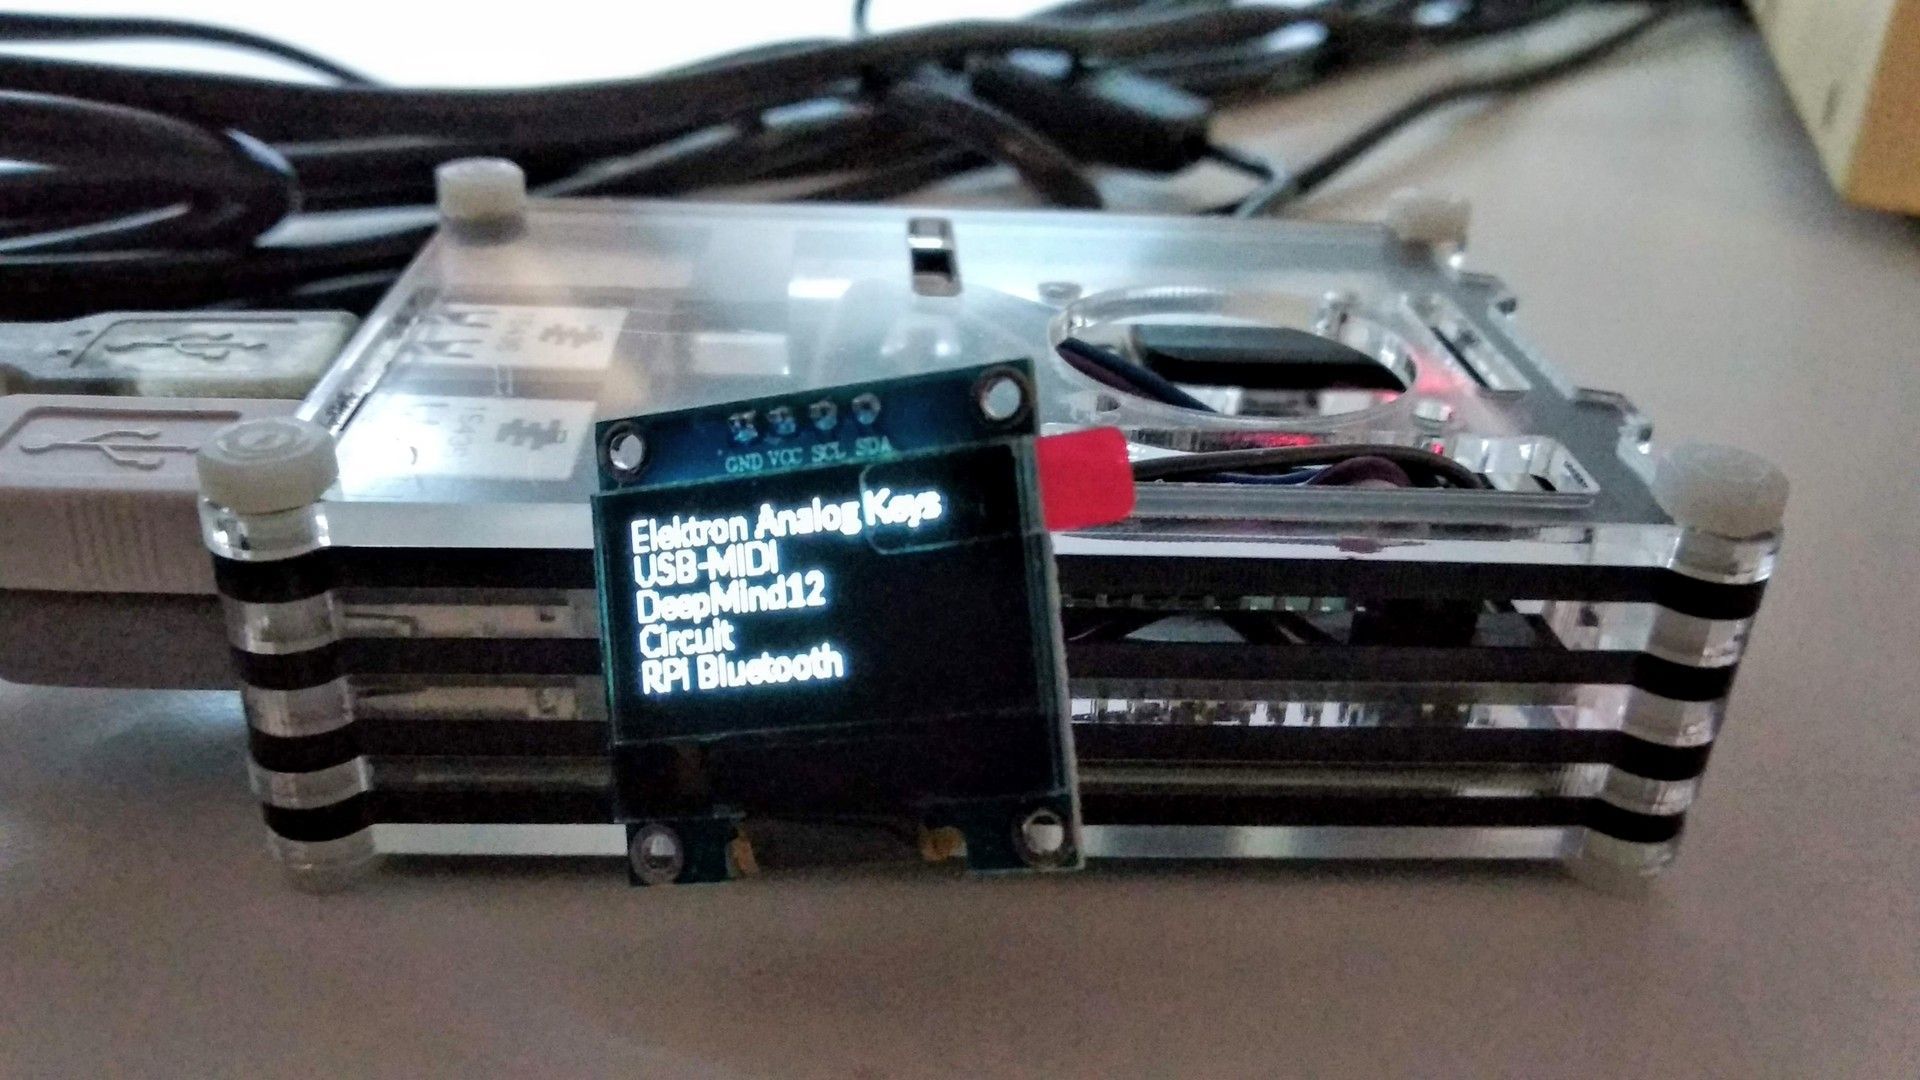
LCD FOR SEEING ACTIVE MIDI CONNECTIONS
I'm using a 128x64 1.3' OLED like this (any SSD1306 driver based OLED should work). This script is based on the Adafruit_Python_SSD1306 library.
Disable readonly mode, by issuing a rw command
sudo apt install fonts-lato
Follow the above instructions to install the Adafruit_Python_SSD1306 library
Issue the command sudo nano /usr/local/bin/lcd-show.py and copy the following content:
- issue the command
sudo nano /usr/local/bin/lcd-show.pyand copy the following content:
#!/usr/bin/python3

import time
import sys

import Adafruit_GPIO.SPI as SPI
import Adafruit_SSD1306

from PIL import Image
from PIL import ImageDraw
from PIL import ImageFont

import subprocess

import fcntl
import errno

def acquireLock():
    while True:
      try:
        ''' acquire exclusive lock file access '''
        locked_file_descriptor = open('/tmp/lockfile.LOCK', 'w+')
        fcntl.lockf(locked_file_descriptor, fcntl.LOCK_EX)
        return locked_file_descriptor
      except IOError as e:
        if e.errno != errno.EAGAIN:
            raise
        else:
            time.sleep(2)

def releaseLock(locked_file_descriptor):
    ''' release exclusive lock file access '''
    locked_file_descriptor.close()

lock_fd = acquireLock()

# Raspberry Pi pin configuration:
RST = None     # on the PiOLED this pin isnt used
# Note the following are only used with SPI:
DC = 23
SPI_PORT = 0
SPI_DEVICE = 0

# 128x64 display with hardware I2C:
disp = Adafruit_SSD1306.SSD1306_128_64(rst=RST)

disp.begin()

# Clear display.
disp.clear()
disp.display()

# Create blank image for drawing.
width = disp.width
height = disp.height
image = Image.new('1', (width, height))

# Get drawing object to draw on image.
draw = ImageDraw.Draw(image)

# Draw a black filled box to clear the image.
draw.rectangle((0,0,width,height), outline=0, fill=0)

padding = -2
top = padding
bottom = height-padding
x = 0

#font = ImageFont.load_default()
height = 12
font = ImageFont.truetype('/usr/share/fonts/truetype/lato/Lato-Semibold.ttf', height)

for y in range(0, len(sys.argv)-1):
    draw.text((x, top+y*height), sys.argv[y+1], font=font, fill=255)

disp.image(image)
disp.display()

releaseLock(lock_fd)
(as you can see it's pretty easy to change font shape and size if you like)
sudo chmod a+x /usr/local/bin/lcd-show.py
Test the script with a command like this:
lcd-show.py "first line" "second line" "here's a quite long line" "4th line of text"The lcd-show.py script is heavily ripped from stats.py, so you may want to troubleshoot OLED connectivity issues by using that first.
Replace /usr/local/bin/connectall.rb code with the following:
#!/usr/bin/ruby

# unconnect everything
system "aconnect -x"

t = `aconnect -i -l`
ports = []
names = []
t.lines.each do |l|
  /client (\d*)\: '(.*)'/=~l
  port = $1
  name = $2
  # we skip empty lines and the "Through" port
  unless $1.nil? || $1 == '0' || /Through/=~l
    ports << port
    names << name
  end
end

ports.each do |p1|
  ports.each do |p2|
    unless p1 == p2 # probably not a good idea to connect a port to itself
      system  "aconnect #{p1}:0 #{p2}:0"
    end
  end
end

cmd = "/usr/local/bin/lcd-show.py"
if names.length>1 then
  command = "#{cmd} #{names.map(&:inspect).join(' ')} "
else
  command = "#{cmd} '' 'No MIDI' 'connections' "
end

pid = spawn(command)
Process.detach(pid)
Connect some MIDI equipment and test the updated script by issuing the command connectall.rb
Put the unit back to readonly mode with the command ro
Power cycle the unit to verify that everything works.
![[EP] Preludi e Variazioni per Pianoforte](/content/images/size/w600/2024/12/cover-sm-1.jpg)
![[Album] Explorations with Pianoforte and Electronics](/content/images/size/w600/2023/12/Ossimuratore---E.P.E.---Neumatica.png)
![[Single] Nevertheless She Feels Nothing but Happiness](/content/images/size/w600/2023/10/cover.jpg)